Proofreading Software: Grammarly

I have been working on my third book.  I’m at the stage where I need to proofread over and over again.  As I did with my last book, I’m turning to automated grammar checkers to help with the process.  They can’t replace a proofreader, but they can help improve the process.  For this book, I’m trying a program I haven’t used before – Grammarly.

Grammarly is a web-based grammar checker.  You just copy and paste text into an online form, and it runs the check.  It is extremely rigorous, and almost overwhelming with how many suggestions it makes.  It took time to get used to this.  Many of the suggestions are style related, suggesting synonyms or simplifying complex sentences.  Although these are valuable suggestions, they aren’t mistakes.

For the major grammatical errors, Grammarly does a great job.  It identifies very subtle mistakes in sentence structure.  This makes it a program you have to spend time using to get the real value out of it.  I found a number of cases where the program identified an error that I thought about writing off as ok.  Then, after reading the sentence very closely, I confirmed the software was right.  This was most likely to occur with long, complex sentences.  The software was able to analyze these sentences and figure out that something was wrong.

Grammarly also identified a number of false positives.  These were sentences that had a structure that didn’t fit exactly how the software recommended.  The suggestions were not wrong.  I’ve seen this with other grammar checkers.  There are always a number of false positives.

The synonym suggestions were helpful.  On every page, the program offers dozens of suggestions for alternative words.  Any writer looking to expand their vocabulary and write with more varied wording choices will find this valuable.

I have also been using the grammar checker in Word and the program on the book.  Whitesmoke and Grammarly are similar in what they accomplish, but they are very different programs.  Both are much more effective than the Word built in grammar checker.  For my book, I ran everything through Word, then Whitesmoke and finally through Grammarly.  This meant that every error Grammarly found was an error Whitesmoke missed.  Whitesmoke does a great job, but there were numerous corrections Grammarly found that Whitesmoke missed.  I expect that if I had reversed this order, Whitesmoke would have found errors Grammarly missed.  Neither will catch 100% of the mistakes.

Overall, I like Grammarly.  It is very effective at identifying grammatical errors, and will help any writer proofread their work.  I’m still deciding if I’ll keep my online subscription.  I already have Whitesmoke and it is effective.  I like both of them, but am not sure I don’t think I need two complete grammar checking packages.  If you are considering a grammar checker (if you don’t have one, you should), it’s really a toss up between the two – they are both very effective.

I’ve been testing both programs on resumes and will follow up with a series of articles with the results.

Resume Keyword Lists

The webinar I presented on Wednesday went great. I reviewed the results of the resume benchmarking study I did for APICS, and then took questions. This was the first time I did a live resume assessment.  During the Q&A, I asked attendees to send their resumes so I could review them during the session.  Two people submitted resumes, and we walked through a few quick changes that they can make to improve their resumes.

One of the changes I identified was removing or relocating a keyword list.  Resume keyword lists are a common element of resumes.  They provide a list of technical terms that a hiring manager may use to find candidates.  This type of list is great for ensuring that a resume shows up in different searches.  Unfortunately, that’s the only benefit of a keyword list.

Putting a list of keywords on your resume will not get a hiring manager excited.  Anyone can pick out important terms and create a list.  It does not convey proficiency in any of the areas.  You have to describe your experience and accomplishments with a skill to make a strong impression.

A good place for a resume keyword list is at the end of the resume.  The section should have a title like “Skills” or “Areas of Expertise” and be the last item of the resume.  This placement ensures that it does not get in the way of more important information.  The keyword list might help a database match your resume to a search, but it is not going to make much of an impression with a human reader.

Keyword lists are most effective when they focus on in-demand technical skills.  Soft skills don’t offer as much value.  For example, leadership, communications skills, organizational skills and administrative skills may be important to a hiring manager, but they make terrible search terms.  They appear on too many resumes, and are important to almost any career.  Technical skills that are specific to a single career field tend to be much better search terms.  Ensuring these terms are in your resume by putting them in a keyword list is a great way to match as many relevant searches as possible.

Some job seekers put the keyword list at the top of their resume.  This can provide an attractive presentation, but it isn’t particularly effective.  Hiring managers will skip a list like this.  Even if they read it, the list isn’t going to do much to sell the candidate’s potential.  The result is the keyword list isn’t much better than just leaving a large blank space.  The top of the resume is valuable real estate and putting low value content such as a keyword list in it is a waste.

Resume Benchmarking Webinar – APICS

I am presenting a webinar on July 13th (2PM EDT) with the results of the Resume Benchmarking Survey I conducted for APICS.  The survey looked at nearly 400 resumes of operations management professionals.  These mainly came from supply chain managers, production managers, production planners/schedulers and logistics managers, but also covered other operations management careers.

The survey looked at the resume structure and how job seekers start their resumes.  Resume titles, the first line and the content of the first section were examined in great detail.  Best practices and common mistakes were identified and reported in the APICS whitepaper. Later this year, I’m going to work on the next phase of the benchmarking survey and assess other sections of the resume.

I’m looking forward to the webinar.  The last webinar I did for APICS was on Resume Formatting and had around 400 attendees.  APICS members can download the whitepaper and register for the webinar at the APICS Career Center.


Not an APICS Member?  Join APICS Today!

Resume Book on Amazon

My book, Resume Writing for Manufacturing Careers, is on Amazon.  We had a few problems with the initial setup of the book, but the publisher did a great job getting everything fixed.  You can now buy the book on Amazon:

Resume Writing for Manufacturing Careers

This book is perfect for anyone in an operations careers, whether production, quality, logistics, transportation, maintenance, scheduling or engineering.  There are tons of examples, often showing both the typical resume content/formatting and then an improved version.  In addition, I show the resume writing process from start to finish.  I used a hypothetical Production Manager for my example.  It took six chapters to show how to write this example resume, with detailed instructions showing each improvement along the way.  There’s also a resume assessment checklist that you can use to review your resume.  It gives specific criteria and best practices for the assessment so you can look at your resume like a resume writing pro.

Amazon also has the Look Inside feature active, allowing you to check out the Table of Contents, first chapter and index.

Buy the Book:  Resume Writing for Manufacturing Careers

Resume Writing for Manufacturing Careers

My new book is now available!

The book can be purchased directly from the publisher, and in the next few days, it will be available on Amazon.  I am also working on getting the book into other retail channels.

The website for the book is up and running… www.resume-writing-for-manufacturing-careers.com

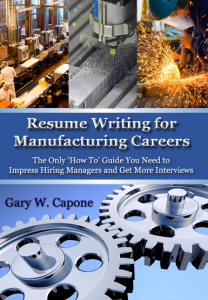
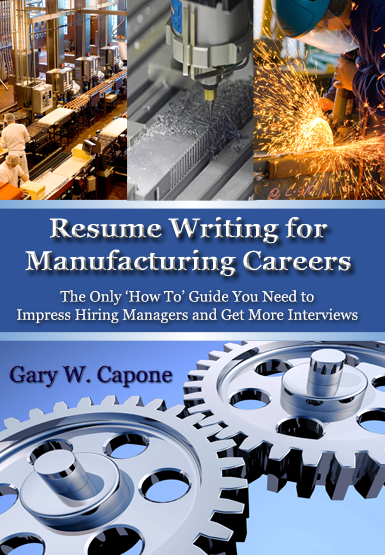
Resume Writing for Manufacturing Careers - Front Cover
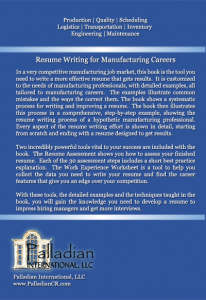
Resume Writing for Manufacturing Careers - Back Cover

New Book – Resume Writing for Manufacturing Careers

My new book is just about ready to go.  I’m due to receive the first printed copy today!  The book, Resume Writing for Manufacturing Careers, teaches the resume writing process in a step-by-step approach.  It starts with the information a job seeker needs to know in order to develop a good resume.  It then shows the resume writing process in great detail for a hypothetical job seeker.  Finally, the book answers many of the questions job seekers have – questions about how to deal with unusual aspects of their careers. 

The book will be available on Amazon on or before September 1st.  We’re also selling the book through some other retail outlets.  I’m working on the website to provide additional information on the book (www.resume-writing-for-manufacturing-careers.com).  I’ve added one page so far, but will follow.

Below is a copy of the cover…

Resume Writing for Manufacturing Careers - Front Cover

Describing Employers on Your Resume

There are 20 million companies in the US.  Although a hiring manager may recognize a few thousand of these, it is impossible to know what all 20 million do.  For most job seekers, this offers a potential pitfall.  Your past employers may be completely unknown to the hiring managers reading your resume.

When a hiring manager has not heard of a company, they will not do research.  The hiring manager screens hundreds of resumes. Googling every unknown company would be an incredibly time consuming activity.  The hiring manager will try to piece together what the company does from what you did at the company.  This is difficult and often leaves a lot of ambiguity in your experience.

You want a hiring manager to understand the context of what you did.  This requires giving background on the company.  Despite this, few job seekers include details about their employers. 

You can improve your resume by offering a few minor details on each employer.  I like to get an estimate of the size of the company.  For example, consider two production supervisors.  One worked for a small job shop with fifteen employees.  The other worked for a large Tier 1 automotive supplier with over 1,500 employees in the facility and more than 20,000 worldwide.  Some of the responsibilities of the two people will be similar, but many will be different.  The job shop will necessitate a wider range of challenges with the supervisor adapting to a lot of different roles on a daily or hourly basis.  The auto supplier is likely to have much more structured procedures and a more limited range of responsibilities.

The differences between the two candidates do not make one candidate better than the other.  They just show a difference in experience.  Some companies will value one of the backgrounds more than the other.  It is likely a small job shop will prefer a candidate coming from a similar type of organization, and an auto supplier will prefer a candidate from a similarly large organization.

The importance of the type of company offers you an opportunity to improve your resume.  By clearly showing the type of organizations you have worked for, you can help the hiring manager screening your resume to better understand how you can fit into their company.  To do this, you only need to add a sentence to each job listing.

I like to list work experience with the company name first and the job titles underneath.  This highlights the time you spent with each organization and is most effective for people who held multiple positions with the same employer.  With this structure, I put the details of the company right below the company name.  Although it is important to describe an employer, I consider this lower priority information and will make the font size small.  I want the reader to be able to learn about the company if they are interested, but will make a job seeker’s accomplishments stand out to be the first thing read.

Example

Work Experience

Widget, Inc., Capital City, State 1/2005 to Present

Tier 1 automotive supplier with $1 billion in revenues. The Capital City plant had 1,000 employees.

Production Supervisor

  • Bullet 1: An accomplishment
  • Bullet 2: An accomplishment

This structure gives an easy way to describe the employer without detracting from the most important information on your resume.  It also takes up very little space as the description of the company is in a very small font.

Separating Accomplishments from Responsibilities

I’ve written a lot about the importance of accomplishments on a resume. Accomplishments show what you did, while responsibilities show what you’re supposed to do. Because accomplishments are so important to make a good impression, you should separate them from the list of responsibilities. The resume I read this morning did the opposite of this.

I’ve written a lot about the importance of accomplishments on a resume.  Accomplishments show what you did, while responsibilities show what you’re supposed to do.  Because accomplishments are so important to make a good impression, you should separate them from the list of responsibilities. The resume I read this morning did the opposite of this.

The resume had a chronological structure, with four sections: Objective, Work Experience, Education and Certifications.  The structure works pretty well.  I would have added a fifth section, Technical Skills, because the job seeker is in a very technical engineering role in the telecom industry.  This isn’t the big problem, though. The work experience section does little to show whether the job seeker has been successful.

In the work experience section, each listing followed the same format:

Job Title, Employment Dates
Company Name, City and State
Responsibilities:
<A bulleted list of responsibilities and accomplishments>

By titling the text under each job as Responsibilities, the job seeker creates an expectation that there won’t be any accomplishments listed.  It is unnecessary to say specifically “Responsibilities,” because anyone reading the resume is going to expect some description of the role. 

I turns out the job seeker did list some accomplishments.  There weren’t many, but each job had at least one.  In each case, it was the last bullet listed under each job.  This ensures someone reading the resume will find the accomplishments as one of the last items read. 

An easy way to fix this would be to summarize the responsibilities in a paragraph and put the accomplishments in a bulleted list.  This will draw the reader’s attention to the accomplishments ahead of the responsibilities and make a much stronger first impression.

How Many Jobs Should You List

Experienced professionals often struggle with deciding how many of their jobs to list and how much detail to provide for each. This can be a tough decision. On a two page resume, you won’t have enough room to write in detail about everything.

Experienced professionals often struggle with deciding how many of their jobs to list and how much detail to provide for each.  This can be a tough decision.  On a two page resume, you won’t have enough room to write in detail about everything.

You should provide at least the last ten years in detail.  Hiring managers will be much more interested in your recent experience, so you want to prioritize this.  You can summarize your experience further back if you don’t go into detail.  For example, you could include a line like:

Progressed from entry level production supervision to materials management, including roles as production controller and logistics manager.

This line would take the reader from the start of your career up to the place on the resume where the detail starts, a materials management position.  In this example, the progression is fairly typically, starting in production and shifting over to materials through a serious of positions.  Most materials professionals will recognize this career path and won’t need additional information.

If you have been with a single company for more than 10 years, you should show the entire progression with them.  Stability with a single company is a very positive sign on a resume.  It shows the person was successful through the progression of promotions.  List the full progression, since it demonstrates a strong pattern of success.  For positions a long time ago, you can summarize the experience by listing the jobs, for example:

  • Logistics Manager December 1992 to July 2000
  • Production Controller August 1988 to December 1992
  • Shipping Supervisor March 1985 to August 1988
  • Production Supervisor June 1980 to March 1985

This shows the progression without any detail, just the titles and dates.  From this point forward, the resume would show the detail of the materials management experience.  You could even consolidate the summary further:

Held production supervision, production control and logistics management positions from June 1980 to July 2000.

This is a short summary providing enough information for a hiring manager to understand how you got to the materials role.

Job seekers who return to school in the middle of their careers have a different challenge.  Getting a degree can transform a career, allowing a person to switch paths completely.  In this case, the experience prior to completing the degree may be irrelevant.  For example, consider a person who worked in hourly production roles and completed an IT degree.  The person upon graduation takes a job as a network administrator and moves along an IT career path from that point forward.  In this case, there’s little benefit to the experience prior to completing the degree, and it can probably be omitted, especially if it is more than ten years ago.

For older workers, there is a lot of concern about age discrimination.  Listing every job back to start of a career will help ensure hiring managers know exactly how old you are.  There’s no reason to highlight this.  List the last 15 to 20 years, giving significant detail to the last 10.

The main reason you want to omit or summarize your experience from more than 10 years ago is it allows you to focus on the last 10 years in much greater detail.  Your recent accomplishments are your biggest selling points, and you want to focus on them.

Proofreading Tips

Checking your resume for typos, spelling errors and grammar mistakes is essential. It is likely you proofread it numerous times and had friends check it for mistakes. This effort will hopefully eliminate all errors. Writing cover letters and filling in text boxes for online job applications is a different story. You can’t work on everything you write for weeks or months with numerous reviewers. So, how can you reduce the likelihood of sending out a bunch of typos?

Checking your resume for typos, spelling errors and grammar mistakes is essential.  It is likely you proofread it numerous times and had friends check it for mistakes.  This effort will hopefully eliminate all errors.  Writing cover letters and filling in text boxes for online job applications is a different story.  You can’t work on everything you write for weeks or months with numerous reviewers.  So, how can you reduce the likelihood of sending out a bunch of typos?

If you struggle with typos in your writing, I’m going to share some techniques that will help you minimize mistakes.  These are the techniques I’ve learned to use with my blog, and can help you improve the quality of your cover letters and other communications.

After writing more than 350 articles for this blog, I’ve gotten much better at minimizing typos.  There has been a definite learning curve.  I’ve always done a lot of writing, but nothing on this scope.  I’ve learned techniques to make it much less likely I’ll publish something with a mistake.  Equally important, the techniques I’ve learned haven’t slowed me down.  I write, review and publish a typical blog article in a single time block, usually an hour to an hour and a half, first thing in the morning.   This gives little time to check an article.

Some people will say I should prioritize proofreading higher and devote more time to proofreading.  If I adopted a scheduled where I write and review articles a week ahead of publishing them, and then review them the day I post them, I could do a better job with typos.  Even better, I could send each article to a professional proofreader for review.  This just doesn’t fit my posting schedule.  I want to write and immediately post. This requires other techniques to quickly and effectively review each document.

The challenge with proofreading your own work is you know what you meant to write.  I have a lot of trouble with this.  I can type 30 to 40 words per minute with decent accuracy, and over 50 with mistakes.  As I write, I get impatient and push my speed beyond what I can do.  This will produce incorrect letters and even skipped words.  I’ve found lately I’ve been typing “you” for “your” by leaving the “r” off a lot.  I’ve also been leaving out small words – is, be, are, of, at – are a few examples. Even worse, I’ve caught places where I miss contractions.  In Friday’s article, I found a place where I typed “can” but meant to type “can’t.”  This completely changed the meaning of the sentence.  Fortunately, I found it before I published the article.

As I proofread, I read what I meant to type.  If the sentence is supposed to have “your” and I type “you,” I read the “your” because I know that’s what it says.  Someone else reading it would immediately see the error, though.  There are ways to fix this, and I’m going to share my process.

My review process has four steps:

Microsoft Word

I write everything in Word.  The spelling/grammar checker will automatically check everything as I type.  This catches a lot of obvious mistakes.  You need to have the real-time grammar checker turned on for this to work.  You also need to pay attention any time Word underlines something in red (spelling) or green (grammar).  By paying attention major mistakes as I type them, I avoid a lot of the errors.

Errors found by Word are the low hanging fruit.  They are so easy to see and fix, there’s no excuse for not fixing them.  I really hate getting a resume written in Word that has a bunch of underlined red text indicating spelling mistakes.  It jumps off the screen before I can start reading the resume.  All the job seeker needed to do was turn on the real-time grammar checker.  Failing to do this will make a poor impression.

Unfortunately, Word can only catch major mistakes.  Using the wrong word often will not be caught by the software. For example, the “you/your” mistake I’ve been making lately is one that Word often misses.  This first check will not be perfect.  It’s just a starting point to clean up the big stuff.

WhiteSmoke

The second quality check I run is with WhiteSmoke, a standalone grammar checking software package.  The software is designed to catch more grammar mistakes than Word or other word processors.  In my experience, it works.  When I first got WhiteSmoke, I checked a number of documents in Word, fixed the errors, and then ran then through WhiteSmoke.  In my writing, this process will find an additional one to two typos for every 200 words I write.  Now, WhiteSmoke isn’t perfect.  It still will not find everything, and it gives a number of false positives.  I would estimate that half the errors it identifies are actually correct, but I’ll take a few false positives to help uncover the mistakes.

I have a lot good to say about WhiteSmoke.  The bottom line is I use it.  The software is much more accurate than Word, it’s easy to use and the technical support team is helpful and responsive.  Despite this, there is one major drawback.  WhiteSmoke is supposed to integrate with any software package including Word and Outlook.  There’s something in my windows settings that prevents this from working and WhiteSmoke doesn’t have an answer for fixing it.

To use WhiteSmoke, I copy what I write over into the WhiteSmoke window and run the check.  I then review the edits and make them manually in the original document.  This is a little tedious, but works.  The way the software is supposed to work, you highlight the text in Word, hit one of the function keys and WhiteSmoke will then open a window and check the document.  As you review the errors, you can simply click the corrections.  At the end, you click Apply and WhiteSmoke will copy the changes back to the original document.  This is great when it works, but in my experience, it rarely works, so I use the more tedious manual method.  Even though it is a little tedious, the software works and makes me more efficient and reduces errors.

(WhiteSmoke Review:  This article was 1770 words when checked.  WhiteSmoke identified 2 spelling errors, 14 grammar errors and 1 style error.  In reviewing the errors, the spelling errors were places where I failed to capitalize the “s” in WhiteSmoke.  Of the 14 grammar errors, I made six changes and found the other eight were actually correct.  The style error was also a good suggestion resulting in a change. So in total, I made 9 separate changes to the article on top of Word’s suggestions because of WhiteSmoke.)

Read Out Loud

The third step in my review process is to read the text out loud.  I really shouldn’t call this reading.  When done right, I read each word individually out loud.  Reading full sentences quickly causes me to see what I meant to write, not what actually ended up on the screen.  Going slow and reading each word is the best way to find places where the writing is awkward, or where I used the wrong word.  It is much more effective when reading out loud.  Start at the beginning and say each word individually.  Go slow and you will pick up on errors.  This process is a little tedious.  If you read any of my articles in the last six months and see some obvious errors, it’s very likely I skipped this step.

Another technique when reading out load is to read from the bottom up.  Read each sentence individually, starting with the last sentence of the document.   This process is a little slower, but can be more effective.  It keeps you from getting into a rhythm with what you know should be there.

(Reading Out Loud Review:  I printed the article and read it out loud.  This identified 29 additional changes.  Many were corrections to grammar errors.  A few were changes were to text that was correct, but the changes made the text read better.)

Google Spell Check

After checking a document in Word and WhiteSmoke, and reading it out loud, there shouldn’t be any obvious errors.  Despite this, I always run a quick spell check from the Google Toolbar before publishing each article.  I do this in case I added new spelling errors as I edit and format the document in the browser window.  It’s rare that I catch a mistake with this last minute check, but I still do it.  I know I can’t write and review an article in under an hour several days a week and never have a mistake.  At the same time, I really don’t want obvious errors that jump off the page, and running spell check one last time can’t hurt.

You can get the Google Spell Check function with the Google toolbar.  All you have to do is hit the button, and it will spell check any form boxes in the browser window.

Other Techniques

This is my four step process.  It’s not perfect.  My goal for this blog is to provide a lot of high quality advice.  Minimizing errors is important to me, but at the end of the day, this is just a blog.  I write quickly and will not be perfect.  Every time I write a blog article about typos or proofreading, I get comments from readers who are deeply offended by every typo I make.  Hopefully, the majority of people will learn from my articles.  In this article, I hope you get something that helps your writing, especially for your job search.  There are other techniques we can employ and further improve the quality of our writing.

Proofreading in a different location than where you wrote the document can help the review process.  It will get you out of the thought process you had when you wrote the document.  Printing the document can help this too.  Both techniques will allow you focus more on what is written instead of what you meant to write.

Letting a document sit for several days can make it much easier to proofread.  You will forget what you meant to write, and read the document as if you weren’t the author.

Get a second opinion.  Ask a friend, co-worker or family member to review important documents.  They will pick up on errors you may have missed.

Hire a professional proofreader.  I can’t overstate the benefit of a professional.  Not only will they give you a second set of eyes on a document, but they are trained to spot mistakes.  When I wrote my book, Power Up Your Job Search: A Modern Approach to Interview Preparation, I used two professional proofreaders. The first reviewed a preliminary copy of the book and corrected a number of major mistakes.  I used the second proofreader late in the process after we had completed a number of rewrites.  The results were fantastic and the two proofreaders help cut months off the editing process.

Getting a second opinion or a professional proofreader will work in a lot of situations, but isn’t practical for everything.  You can’t stop in the middle of every job application form and send your text to a proofreader.  Even a lightning fast turnaround of a few hours will cause your job search to grind to a halt.  At some point, you will need a DIY approach, and I hope my techniques help you to write a little more effectively and accurately.